Introduction
UITableView 提供了很多很方便的方法以至于我们有的时候不能完全记住他的代理方法,这里说下他的编辑模式;项目里用到了编辑,在踩过一些坑之后,对 UITableView 的编辑更加的清晰了,这里简单记录下。
开启编辑模式
- 这个很简单了,设置 UITableView 的编辑属性即可,方法则提供了动画选项:
1
2
3
// default is NO. setting is not animated.
@property (nonatomic, getter=isEditing) BOOL editing;
- (void)setEditing:(BOOL)editing animated:(BOOL)animated;
如果控制器是 UITableViewController ,那么可直接使用控制器的方法,而无需写一句代码,iOS 代码就是这么简单,系统为我们做了太多的东西了,点击 item 的方法也已经绑定好了!
1
self.navigationItem.leftBarButtonItem = self.editButtonItem;
editButtonItem 是控制器的属性;你可以重写这个方法,处理一些必要的操作,不过千万要记得调用 super 哦!
1
2
3
4
5
6
7
8
9
@interface UIViewController (UIViewControllerEditing)

@property(nonatomic,getter=isEditing) BOOL editing;
// Updates the appearance of the Edit|Done button item as necessary. Clients who override it must call super first.
- (void)setEditing:(BOOL)editing animated:(BOOL)animated;
// Return an Edit|Done button that can be used as a navigation item's custom view. Default action toggles the editing state with animation.
- (UIBarButtonItem *)editButtonItem;

@end
这是我 Demo 里重写的,目的是切换编辑效果的,每次点击都会不一样,循环往复的:
1
2
3
4
5
6
7
8
9
10
11
- (void)setEditing:(BOOL)editing animated:(BOOL)animated
{
    if (editing) {
        self.editingStyle = self.editingStyle + 1;
        if (UITableViewCellEditingStyleInsert < self.editingStyle) {
            self.editingStyle = UITableViewCellEditingStyleNone;
        }
    }
    [self.tableView reloadData];
    [super setEditing:editing animated:animated];
}
设置编辑样式
- 系统提供了3中编辑样式,分别是:
1
2
3
4
5
typedef NS_ENUM(NSInteger, UITableViewCellEditingStyle) {
UITableViewCellEditingStyleNone,
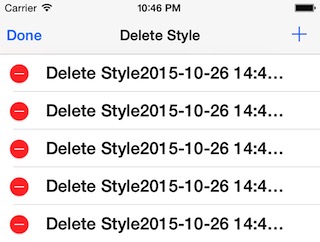
UITableViewCellEditingStyleDelete,
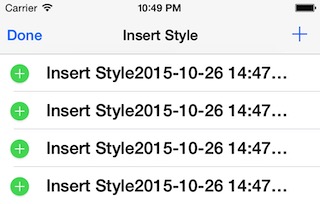
UITableViewCellEditingStyleInsert
};
- UITableViewCellEditingStyleDelete 对应的效果是:
- UITableViewCellEditingStyleInsert 对应的效果是:
- UITableViewCellEditingStyleNone 对应的效果是:
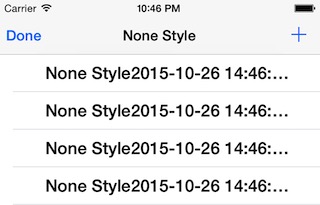
- 前两个都比较熟悉了,对于最后这个有些同学可能不是很熟悉了,这个是系统为我们提供的空白的,所以我们就利用这个进行自定义;
自定义编辑样式
- 自定义编辑样式的思路是:选择的系统样式 UITableViewCellEditingStyleNone,然后自己添加视图,做动画;实现代码:
1
2
3
4
5
6
7
8
9
10
11
12
13
14
15
16
17
18
19
20
21
22
23
24
25
26
27
28
29
30
31
32
33
34
35
36
37
38
39
40
41
42
43
44
45
46
47
48
49
- (void)setEditing:(BOOL)editing animated:(BOOL)animated
{
    if (self.isEditing == editing) return;

    if (UITableViewCellEditingStyleNone == self.editingStyle) {
        if (editing) {

            UIControl *view = [[UIControl alloc]initWithFrame:CGRectMake(-20,(self.bounds.size.height -20)/2.0, 20, 20)];
            view.backgroundColor = [UIColor redColor];
            [view addTarget:self action:@selector(tipedEditView) forControlEvents:UIControlEventTouchUpInside];
            view.tag = 23456;
            [self addSubview:view];
            CGRect destRect = view.frame;
            destRect.origin.x = 15;

            if (animated) {
                [UIView animateWithDuration:0.25 animations:^{
                    view.frame = destRect;
                }];
            }else{
                view.frame = destRect;
            }
        }else{
            UIView *view = [self viewWithTag:23456];
            CGRect destRect = view.frame;
            destRect.origin.x = -20;

            if (animated) {
                [UIView animateWithDuration:0.25 animations:^{
                    view.frame = destRect;
                }completion:^(BOOL finished) {
                    [view removeFromSuperview];
                }];
            }else{
                view.frame = destRect;
                [view removeFromSuperview];
            }
        }
    }
    [super setEditing:editing animated:animated];
}

- (void)tipedEditView
{
//    回掉到tableview的dasource去;
    id<UITableViewDataSource>delete = self.ownerTable.dataSource;
    NSIndexPath *idx = [self.ownerTable indexPathForCell:self];
    [delete tableView:self.ownerTable commitEditingStyle:UITableViewCellEditingStyleNone forRowAtIndexPath:idx];
}
datasource 处理:
1
2
3
4
5
//        自定义删除;
  [self.objects removeObjectAtIndex:indexPath.row];
  [tableView beginUpdates];
  [tableView deleteRowsAtIndexPaths:@[indexPath] withRowAnimation:UITableViewRowAnimationRight];
  [tableView endUpdates];
最终的效果是:
- 通过验证发现,编辑动画,系统也是在 setEditing 方法里处理的;如果直接返回的话可以看到向右滑动的效果就没有了;
1
2
3
4
- (void)setEditing:(BOOL)editing animated:(BOOL)animated
{
    return;
}

注:这个是 不支持多选 的!
以上编辑模式,会触发这个代理方法:
1
- (void)tableView:(UITableView *)tableView commitEditingStyle:(UITableViewCellEditingStyle)editingStyle forRowAtIndexPath:(NSIndexPath *)indexPath;
通过 editingStyle 区分开是哪种编辑;以上模式编辑时默认不可以选择,所以也不会触发选择的代理方法! 可以通过 tableView.allowsSelectionDuringEditing = YES;允许选择!
如何支持多选
- 使用系统提供的一个开关开启多选模式;在开启编辑模式前打开这个开关即可:
1
self.tableView.allowsMultipleSelectionDuringEditing = YES;//默认关闭的
效果是:
如果没什么特别要求,那么这个是可以满足需求的;选中和取消分别调用下面的代理方法,回调方法和其他编辑模式不太一样:
1
2
- (void)tableView:(UITableView *)tableView didSelectRowAtIndexPath:(NSIndexPath *)indexPath;
- (void)tableView:(UITableView *)tableView didDeselectRowAtIndexPath:(NSIndexPath *)indexPath;
注:开启这个开关后,这个代理方法不再调用
1
- (UITableViewCellEditingStyle)tableView:(UITableView *)tableView editingStyleForRowAtIndexPath:(NSIndexPath *)indexPath
- 使用系统没有公开的枚举值开启:
1
2
3
4
- (UITableViewCellEditingStyle)tableView:(UITableView *)tableView editingStyleForRowAtIndexPath:(NSIndexPath *)indexPath
{
    return UITableViewCellEditingStyleDelete | UITableViewCellEditingStyleInsert;
}
- 如果想改变这个多选的圆圈,切入口还是 cell 的 - (void)setEditing:(BOOL)editing animated:(BOOL)animated;方法;做法是找到系统的图片隐藏掉,然后把自己想要的加上,做下动画就行了,具体代码暂不放出了…
完
已经把 Demo 传到了github 上,多谢支持!